Did you know that more than 1 trillion gallons of water are wasted nationwide each year due to household leaks, according to the Environmental Protection Agency (EPA)? Leaks in the bathroom, especially in toilets, faucets, shower head hose attachments, and bathtubs, are among the most common culprits. These leaks can often go unnoticed for months, resulting in high water bills and potential damage to your home.
If you want to save water, money, and keep your fixtures in excellent shape, it’s crucial to be aware of leaks and take the necessary steps to repair them. In this guide, we will show you how to locate and fix leaks in your bathroom, helping you say goodbye to leaks and enjoy efficient faucets and showers.
Key Takeaways:
- Fixing leaks in faucets and showers can help you save water and prevent damage to your home.
- Common causes of toilet leaks include a faulty flapper valve and loose tee bolts or a damaged wax ring at the base.
- Leaky bathroom faucets are often caused by worn-out washers, faulty cartridges, or damaged seals at the base.
- Shower head leaks can be due to worn-out washers, damaged valves, or high water pressure.
- Replacing or repairing faulty components is essential to fix leaks in faucets and showers.
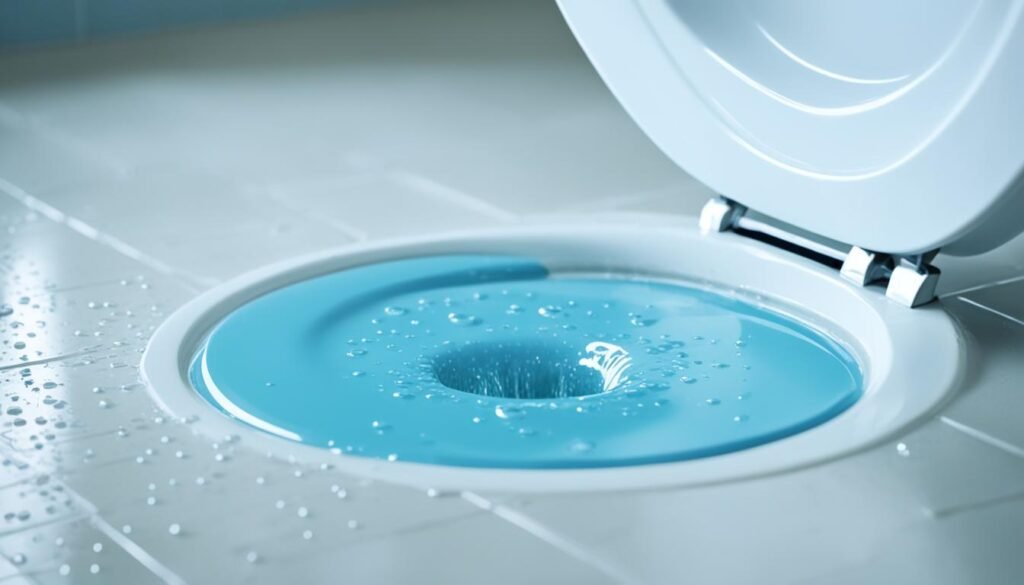
Detecting Toilet Leaks
Toilet leaks can be a silent and sneaky problem, often going unnoticed until they become a major issue. Common causes of toilet leaks include incorrect water level adjustment, a damaged float, or a worn-out refill valve. Detecting these leaks early on is crucial in order to prevent water wastage and potential damage to your bathroom.
One simple and effective way to test if your toilet is leaking is by performing a dye test. Here’s how you can do it:
- Drop a few drops of food coloring or a dye tablet into the tank water. Use a color that stands out, like bright blue or red.
- Wait for about 15 minutes without flushing the toilet.
- Check the toilet bowl. If you see the colored water seeping into the bowl, you have a leak.
If the dye appears in the bowl, it indicates a faulty flapper valve. The flapper valve is responsible for controlling the release of water from the tank into the bowl. A damaged or misaligned flapper valve can cause leaks. Replacing it will help resolve the issue and prevent further water wastage.
Leaking at the base of the toilet is another common problem. This can be caused by loose tee bolts or a damaged wax ring that seals the connection between the toilet and the floor. Tightening the tee bolts or replacing the wax ring can fix the leak at the base of the toilet.
It’s important to address toilet leaks promptly to conserve water, prevent further damage, and maintain the efficiency of your bathroom fixtures.
Tips to Detect Internal Toilet Leaks
Some leaks may occur within the toilet’s internal components, which can be difficult to detect. Here are a few signs that may indicate an internal toilet leak:
- Continuous or intermittent sounds of running water when the toilet is not in use.
- A noticeable increase in your water bill without any significant changes in water usage.
- The toilet handle feels loose or requires excessive force to flush.
- The toilet tank takes longer to refill after being flushed.
If you suspect an internal toilet leak, it’s best to consult a professional plumber to accurately diagnose and repair the issue.
Fixing Leaky Bathroom Faucets
A leaky bathroom faucet can waste a significant amount of water and increase your water bill. Don’t let those drops add up! By addressing the issues causing the leaks, you can save water, save money, and prevent further damage to your faucet and bathroom.
Common causes of faucet leaks include:
- A faulty cartridge insert
- Worn-out washers
- Damage to o-rings or valve cartridges
- A worn seal around the faucet base
If you’re wondering how to fix a dripping faucet, don’t worry – it’s a task you can handle! The specific steps to repair your leaky bathroom faucet may vary depending on the brand and model, but here’s a general guide to get you started:
1. Gather the Necessary Tools
Before you begin, make sure you have the following tools:
- Adjustable wrench
- Screwdriver (Phillips or flathead, depending on your faucet)
- Plumber’s tape
- Replacement parts (such as a cartridge, washers, o-rings)
2. Turn Off the Water Supply
Locate the shut-off valves under the sink and turn them off to stop the flow of water.
3. Disassemble the Faucet
Remove decorative caps or handles to access the internal components of your faucet. Use a screwdriver or Allen wrench to loosen and remove any screws or nuts holding the handle in place. Carefully detach the handle and set it aside.
4. Inspect and Replace Faulty Parts
Examine the cartridge, washers, o-rings, and valve cartridges for signs of damage or wear. If any of these components show signs of deterioration, it’s time to replace them. Consult the manufacturer’s instructions or seek guidance from a hardware store professional to ensure you purchase the correct replacement parts for your specific faucet model.
5. Install the Replacement Parts
Follow the manufacturer’s instructions to install the new cartridge, washers, o-rings, or valve cartridges. Make sure to apply plumber’s tape to the threads of any connections.
6. Reassemble the Faucet
Put the faucet handle back in place and secure it with screws or bolts. If necessary, reattach any decorative caps or handles.
7. Turn On the Water Supply
Once everything is reassembled, turn the shut-off valves back on to restore the water supply.
That’s it! You’ve successfully fixed your leaky bathroom faucet. Turn on the faucet and check for any remaining leaks. If the dripping persists or you encounter any difficulties during the repair process, it may be helpful to consult a professional plumber for further assistance.
Remember, regular maintenance of your faucets can help prevent leaks and extend their lifespan. Keep an eye out for early signs of leaks, such as consistent dripping or wetness around the faucet, and address them promptly to avoid wasted water and potential damage.
| Leak Location | Possible Causes | How to Fix |
|---|---|---|
| Leak from the Spout | Worn-out valve seat, damaged o-ring, faulty cartridge | Replace the valve seat, o-ring, or cartridge |
| Leak from the Base | Dry or cracked o-ring, worn inner cartridge | Replace the o-ring or inner cartridge |
Repairing Leaky Shower Heads
A dripping shower head can waste a significant amount of water and lead to higher utility bills. If you’re dealing with a leaky shower head, it’s important to take action to conserve water and maintain the efficiency of your bathroom fixtures. This section will guide you through the necessary steps to fix a leaking shower head and address the common causes behind this issue.
The most common causes of shower head leaks include:
- Worn-out washers
- Damaged valves
- Corroded shower heads
- High water pressure
Start by soaking the shower head in white vinegar overnight to remove mineral deposits that may be blocking the water flow. This simple remedy can sometimes solve the problem without any further intervention.
If soaking the shower head doesn’t fix the leak, you may need to replace certain components. Common parts that may need replacement include washers, o-rings, valves, or even the entire shower head itself.
Here’s a step-by-step guide to help you fix a leaking shower head:
- Turn off the water supply: Before beginning any repair work, make sure to turn off the water supply to the shower.
- Remove the shower head: Unscrew the shower head from the shower arm using an adjustable wrench or pliers. Place a cloth over the shower arm to protect it from scratches.
- Inspect and clean the components: Examine the washers, o-rings, and valves for any signs of damage or wear. Clean them thoroughly to remove any debris or mineral buildup.
- Replace damaged components: If you notice any damaged or worn-out parts, replace them with new ones. Make sure to choose the appropriate replacement parts that match the specifications of your shower head.
- Apply plumber’s tape: Wrap plumber’s tape around the threaded connection on the shower arm. This helps create a watertight seal when reattaching the shower head.
- Reattach the shower head: Screw the shower head back onto the shower arm, tightening it securely. Use a cloth or piece of rubber to protect the shower head from scratches while tightening.
- Turn on the water supply: Once the shower head is securely attached, turn on the water supply to test if the leak has been fixed.
If you’ve followed these steps and the shower head is still leaking, there might be an issue with the diverter valve. The diverter valve directs water to different outlets, such as the tub spout or handheld showerhead. A faulty diverter valve can cause water to leak from the shower head. In such cases, it’s recommended to consult a professional plumber for further assistance and possible valve replacement.
Remember, fixing a leaking shower head not only saves water and reduces your utility bills but also helps maintain the functionality and longevity of your bathroom fixtures.
“When the shower head leaks, it not only wastes water but can also disrupt your showering experience. Taking prompt action and following the right repair steps can help you resolve the issue efficiently.” – [Your Name]
Steps to Replace/Install Faucet by Type
Depending on the type of faucet you have, the process of replacing or installing a new faucet can vary. Whether you’re looking to replace a worn-out faucet or installing a brand new one, it’s important to follow the specific instructions for your faucet type to ensure a proper installation.
Single-handle/Single Valve Faucets
If you have a single-handle faucet, here are the steps to replace/install it:
- Turn off the water supply to the faucet. This is usually done by shutting off the main water valve.
- Remove the handle by unscrewing the setscrew or removing the decorative cap and unscrewing the handle.
- Unscrew the bonnet nut and remove the cartridge.
- Install the new cartridge and tighten the bonnet nut.
- Reattach the handle and turn on the water supply to test for any leaks.
Double-handle Faucets
If you have a double-handle faucet, here are the steps to replace/install it:
- Turn off the water supply to the faucet.
- Remove the handles by unscrewing the setscrews or removing any decorative caps and screws.
- Take off the escutcheon plate to access the valve stems.
- Remove the old valve stems.
- Insert the new valve stems and tighten them securely.
- Reassemble the faucet by attaching the escutcheon plate and handles.
- Turn on the water supply and check for any leaks.
Three-handle Faucets
If you have a three-handle faucet, follow these steps to replace/install it:
- Turn off the water supply to the faucet.
- Remove the handles by unscrewing the setscrews or removing any decorative caps and screws.
- Take off the escutcheon plate to access the valve stems.
- Remove the old valve stems.
- Insert the new valve stems and tighten them securely.
- Reassemble the faucet by attaching the escutcheon plate and handles.
- Turn on the water supply and check for any leaks.
Ball or Thermostatic Faucets
For ball or thermostatic faucets, the replacement/installation steps are as follows:
- Turn off the water supply to the faucet.
- Remove the handle by unscrewing the setscrew or removing any decorative caps and screws.
- Take off the escutcheon plate to access the valve assembly.
- Remove the brass or plastic nut that holds the valve assembly in place.
- Take out the old valve assembly and replace it with a new one.
- Tighten the brass or plastic nut to secure the new valve assembly.
- Reassemble the faucet by attaching the escutcheon plate and handle.
- Turn on the water supply and check for any leaks.
Remember, if you’re not confident in your plumbing skills, it’s always best to consult a professional for faucet replacement or installation. A qualified plumber can ensure a proper installation and help prevent any potential issues in the future.
Tub Spout Diverter Replacement
If you have a tub spout with a faulty diverter, it’s essential to replace the spout to ensure proper functionality. Follow these steps to replace the tub spout diverter:
- First, turn off the water supply to the tub to prevent any leaks or water damage during the replacement process.
- Next, locate the set screw or collar on the bottom side of the tub spout. Loosen the set screw or turn the collar counterclockwise to remove the spout.
- Once the old spout is removed, clean the wall pipe to ensure a clean and snug fit for the new spout.
- Apply thread-sealing tape to the end of the wall pipe to ensure a watertight seal.
- Now, securely screw the new tub spout onto the wall pipe. Use a wrench to tighten it if necessary.
- Finally, apply a bead of caulk around the base of the spout where it meets the wall to create a waterproof seal.
By following these simple steps, you can successfully replace the tub spout diverter and restore functionality to your bathtub. Enjoy a fully operational tub with a new and reliable diverter.
Expert Tip:
If you’re unsure about any step or encounter difficulties during the replacement process, it’s always best to consult a professional plumber. They have the necessary expertise and tools to ensure a successful tub spout diverter replacement.
Repairing a Leak
If you have a leaky faucet or shower, it’s important to address the issue as soon as possible to prevent water damage and save on utility bills. The most common causes of leaks are faulty valves, damaged washers, worn-out seals, and loose fittings. Depending on the specific problem, you may need to replace or repair these components. In some cases, a simple cleaning or tightening of bolts may be sufficient to fix the leak.
Steps to Fix a Leaky Faucet:
- Turn off the water supply to the faucet.
- Remove the handle and any decorative caps or covers.
- Using a wrench, unscrew the valve assembly or cartridge.
- Inspect the components for damage or wear.
- If the washers or O-rings are worn, replace them with new ones.
- Reassemble the faucet and turn the water supply back on to check for leaks.
Steps to Repair a Leaky Shower:
- Turn off the water supply to the shower.
- Remove the shower head and inspect it for damage or clogs.
- If necessary, clean the shower head using a mixture of vinegar and water.
- Check the shower valve for any loose fittings or damaged parts.
- If the valve is faulty, you may need to replace it.
- Reinstall the shower head and turn the water supply back on to check for leaks.
Remember, if you’re unsure about any repairs or installations, don’t hesitate to seek professional help. It’s better to have the problem fixed correctly the first time to avoid further damage or recurring leaks.
| Faucet Leaks | Causes | Solutions |
|---|---|---|
| Leak from Spout | Worn-out washers or seals | Replace washers or seals |
| Leak from Base | Loose fittings or damaged o-rings | Tighten fittings or replace o-rings |
| Leak from Handle | Faulty valve assembly or cartridge | Replace valve assembly or cartridge |
By taking prompt action to repair leaks in your faucets and showers, you can ensure the efficient operation of your plumbing fixtures, conserve water, and save money on your utility bills.
Installation by Brand
Each faucet brand may have its own specific instructions for installation. Brands like Kohler, Moen, and Delta provide guidelines for installing their faucets. It’s important to follow these instructions carefully to ensure a proper installation and avoid any issues with functionality or warranty.
Kohler Faucet Installation
“Experience the perfect blend of style and function with Kohler faucets. Follow these step-by-step instructions for a successful installation of your Kohler faucet:
- Turn off the water supply valves beneath the sink.
- Remove the existing faucet by disconnecting the water supply lines and unscrewing the mounting nuts.
- Clean the surface around the mounting holes and remove any old putty or sealant.
- Apply a new bead of plumber’s putty or silicone sealant around the base of the faucet.
- Insert the faucet into the mounting holes and secure it with the mounting nuts.
- Connect the water supply lines to the appropriate connections on the faucet.
- Turn on the water supply and check for any leaks.
- Enjoy your newly installed Kohler faucet!”
Moen Faucet Installation
“Upgrade your bathroom with a reliable and stylish Moen faucet. Follow these straightforward steps to install your Moen faucet:
- Shut off the water supply valves.
- Remove the old faucet by unscrewing the mounting nuts and disconnecting the water supply lines.
- Prepare the new faucet by applying plumber’s tape to the threads of the inlet connections.
- Position the new faucet in the mounting holes and secure it with the mounting nuts.
- Connect the water supply lines to the appropriate connections on the faucet.
- Turn on the water supply and check for any leaks.
- Your Moen faucet installation is complete!”
Delta Faucet Installation
“Discover the innovative features of Delta faucets and install yours with ease using these simple instructions:
- Switch off the water supply valves.
- Disconnect the water supply lines and remove the old faucet.
- Clean the mounting surface and remove any debris or old sealant.
- Insert the new Delta faucet into the mounting holes and secure it with the mounting nuts.
- Attach the water supply lines to the appropriate connections on the faucet.
- Turn on the water supply and check for any leaks.
- Your Delta faucet is now successfully installed!”
Is it Time to Upgrade?
If you’re experiencing frequent leaks or other issues with your faucets and showers, it may be a sign that it’s time to upgrade to new fixtures. Upgrading can not only improve the functionality and efficiency of your plumbing system but also enhance the aesthetic appeal of your bathroom. Consider factors such as the age and condition of your current fixtures, your budget, and your personal preferences when deciding whether to upgrade.
Conclusion
When it comes to maintaining your plumbing system and preventing water leaks, repairing faucets and showers plays a crucial role. By promptly addressing leaks and using the correct techniques, you can not only save water but also lower your utility bills and protect your home from potential water damage. Whether you’re dealing with a toilet leak, a dripping faucet, or a faulty shower head, taking care of these issues will help you bid farewell to leaks and ensure the efficient operation of your plumbing fixtures.
If you’re uncertain about any repairs or installations, don’t hesitate to seek professional help. Plumbing repairs require expertise and specialized knowledge, and professional plumbers can assist you in resolving any plumbing problems you may encounter.
Remember, taking care of your plumbing system is essential for a sustainable and efficient household. Through regular maintenance and addressing leaks promptly, you can conserve water and maintain the integrity of your plumbing fixtures for years to come.
FAQ
How do I detect toilet leaks?
Toilet leaks can be detected by performing a simple dye test. Drop food coloring or dye tablets into the tank water, and if colored water shows up in the toilet bowl within 15 minutes, you have a faulty flapper valve. Leaks at the base of the toilet are usually caused by loose tee bolts or a damaged wax ring.
What causes a leaky bathroom faucet?
Common causes of a leaky bathroom faucet include a faulty cartridge insert, worn-out washers, damaged o-rings or valve cartridges, and a worn seal around the faucet base.
How can I fix a leaking shower head?
To fix a leaking shower head, you can start by soaking the head in white vinegar overnight to remove mineral deposits. If that doesn’t solve the issue, you may need to replace damaged components such as washers, o-rings, valves, or even the entire shower head.
How can I replace or install a faucet?
The process of replacing or installing a faucet depends on the type. Single-handle, double-handle, three-handle, and ball or thermostatic faucets all require different steps. It’s important to follow the specific instructions for your faucet type.
How do I replace a tub spout diverter?
To replace a tub spout diverter, you will need to remove the old spout by turning it counterclockwise or loosening the set screw. Clean the wall, apply thread-sealing tape to the pipe, screw in the new spout, and tighten it with a wrench. Finally, apply caulk where the spout meets the wall to create a watertight seal.
What should I do to repair a leak?
The most common causes of leaks are faulty valves, damaged washers, worn-out seals, and loose fittings. Depending on the specific problem, you may need to replace or repair these components.
Are there specific installation instructions for different faucet brands?
Yes, each faucet brand may have its own specific instructions for installation. It’s important to follow these instructions carefully to ensure a proper installation and avoid any issues with functionality or warranty.
When should I consider upgrading my faucets and showers?
If you’re experiencing frequent leaks or other issues with your faucets and showers, it may be a sign that it’s time to upgrade. Consider factors like the age and condition of your current fixtures, your budget, and your personal preferences when deciding whether to upgrade.
How can I save water and prevent leaks?
Repairing faucets and showers is an important part of maintaining your plumbing system and preventing water leaks. By addressing leaks promptly and using the proper techniques, you can save water, lower your utility bills, and protect your home from water damage.